Video
warning
The document is a continuation of the previous document, if you have landed directly on this page then, Please read from page Get started.
What is Video Component?

List of features implemented in Shunya stack
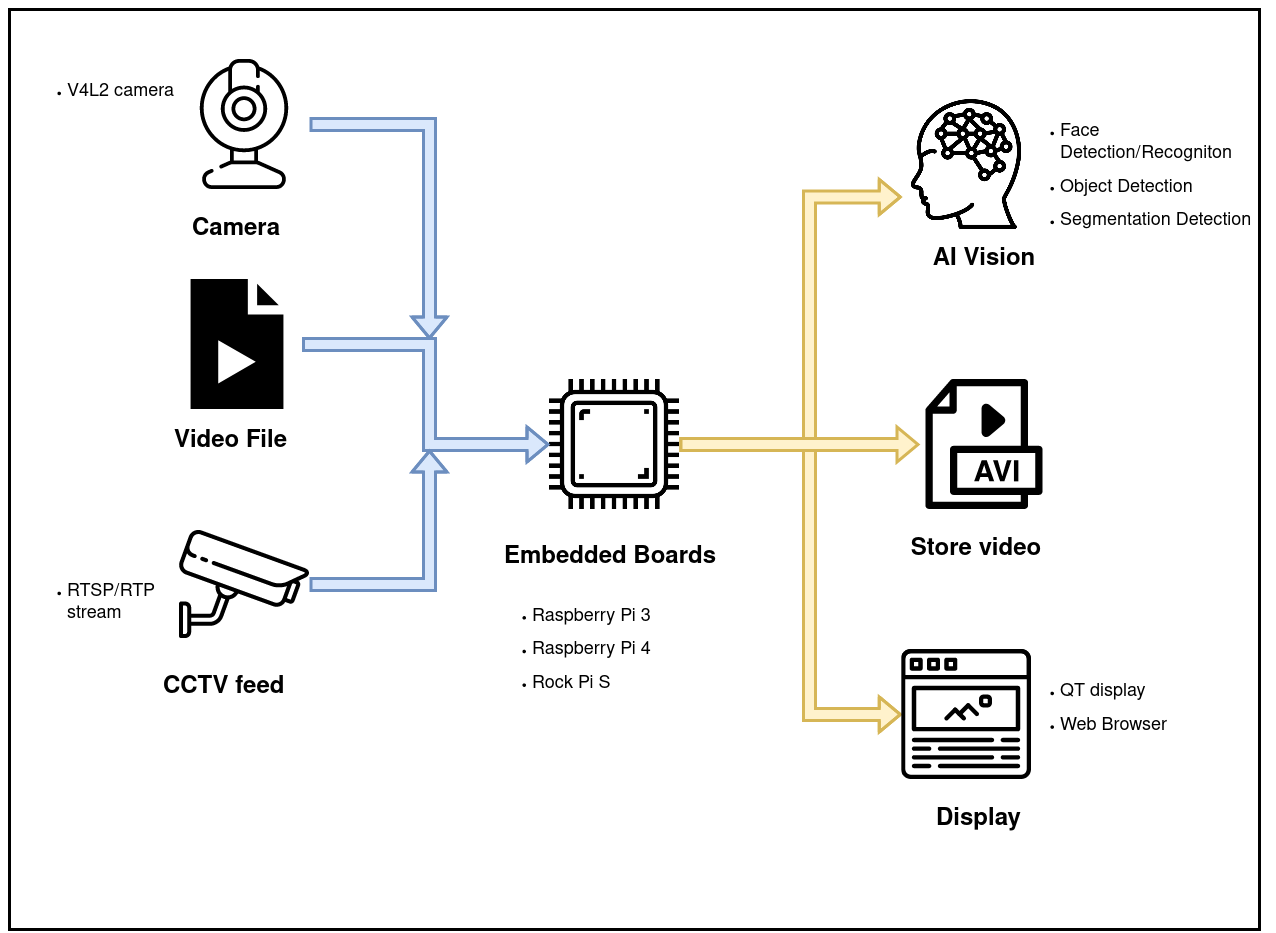
With Shunya stack Video component you can
- Capture video frames from these sources.
- Camera (USB/Embedded)
- Video file.
- RTSP Stream (CCTV stream)
- Store in 2 formats
- Image (Screenshot of one frame)
- Video
Using Video component
Requirements to use Video component
- Shunya OS installed (supported Arm devices) or Shunya OS docker container (X86 based windows/linux devices)
- Availability of any one video source. (for example: Webcamera or Video file)
Steps to use Video component
- Set Capture settings in Shunya.
- Set Store settings in Shunya.
- Implementation for Capture
- Implementation for Store
note
Run the steps given below inside Shunya OS installed (supported Arm devices) or Shunya OS docker container (X86 based windows/linux devices) terminals.
Step 1: Set Capture settings in Shunya.
Set Capture source, by editing the config file /etc/shunya/config.json inside Shunya OS.
A simple configuration should contain these parameters.
| Config | Description |
|---|---|
cameraId | Camera device number (optional) |
videoPath | Full Path to the Video file (optional) |
streamUrl | Url for capturing RTSP/UDP streams. (optional) |
Example configuration for Video source
- Camera
- Video file
- Video stream
{
    "video-source": {
        "cameraId": "0"
    }
}
{
    "video-source": {
        "videoPath": "/home/shunya/15.mp4"
    }
}
{
    "video-source": {
        "streamUrl": "udp://localhost:9090"
    }
}
Pro-tip
Lets say your video source changed from video file to webcam, then you dont have to change the whole code, you just need to change the configuration and the video component will adjust accordingly.
Step 2: Set Store settings in Shunya.
Set Store Location, by editing the config file /etc/shunya/config.json inside Shunya OS.
A simple configuration should contain these parameters.
| Config | Description |
|---|---|
storeType | Storing format, takes values image or video |
storePath | Full Path to the folder you want to store. |
videoFps | FPS of the output video (only for storeType = video) |
Example configuration for Video store
You can store both images as well as video
- Image
- Video file
Writing the below json in /etc/shunya/config.json file, will tell the Shunya stack to
store an image at /home/shunya/Desktop folder
"imageStore": {
    "storeType": "image",
    "storePath": "/home/shunya/Desktop"
}
Writing the below json in /etc/shunya/config.json file, will tell the Shunya stack to
store an video at /home/shunya/Desktop folder
"videoStore": {
    "storeType": "video",
    "storePath": "/home/shunya/Desktop",
    "videoFps": 10  // FPS of the video stored
}
Pro-tip
Lets say your video store path has changed, then you dont have to change the whole code ore re-compile, you just need to change the configuration and the video component will adjust accordingly.
Step 3: Implementation for Capture
Let's try to implement video Capture using Shunya stack
Steps are :
Start with an ready to use template
git clone https://gitlab.iotiot.in/repo-public/examples.git
cd examples/simple-examples/capture-videoOpen the
capture-video.cppin an text editor and modify as per your use case.First we load the JSON settings for Capture, add the code in your
main()functioncaptureObj src;
src = newCaptureDevice("video-source"); /* Argument = JSON Title, Load settings from JSON file */To Capture one frame, modify the code
cv::Mat frame  = captureFrameToMem(&src); /* Capture one frame at a time in a loop*/
if (frame.empty()){ /* Check if frame is empty*/
    fprintf(stderr, "Frame empty.");
    closeCapture(&src); /* Close Video source and exit */
    return 0;
}
/* frame variable contains one frame, this can be sent to other components for processing */Once you are done editing, save and compile the code , by running
mkdir build && cd build
cmake ../
makeRun the code
sudo ./capture-video
Step 4: Implementation for Store.
Let's try to implement video Store using Shunya stack
Steps are :
Start with an ready to use template
git clone https://gitlab.iotiot.in/repo-public/examples.git
cd examples/simple-examples/store-videoOpen the
store-video.cppin an text editor and modify as per your use case.First we load the JSON settings for Store, add the code in your
main()function- Image
- Video file
storeObj imageStore; /* Image Store instance */
imageStore = newImageStore("imageStore"); /* Argument = JSON Title, Load settings from JSON file */storeObj videoStore; /* Video Store instance */
videoStore = newVideoStore("videoStore"); /* Argument = JSON Title, Load settings from JSON file */To Store one frame, modify the code
- Image
- Video file
storeFrameToDisk(&imageStore, frame, "file.jpg"); /* Store frame as file.jpg*/storeStreamToDisk(&videoStore, frame, "file.avi"); /* Store frame into file.avi*/Cleanup the store operations with,
- Image
- Video file
closeStore(&imageStore);closeStore(&videoStore);Once you are done editing, save and compile the code , by running
mkdir build && cd build
cmake ../
makeRun the code
sudo ./store-video